

What does it mean to spin seams?
Spinning seams? What? I know, it sounds like a weird type of dance but it's really just a nifty trick to help you achieve nice flat seams during piecing and ironing certain quilt blocks. This is what that looks like:
Why would you want to spin seams?
Spinning seams allows the bulk of fabric that was pressed to one side to be spread out more evenly, creating a flatter join. This makes it easier when quilting your quilt later on. If a seam is too bulky, your needle won't be able to sew through it, and you could potentially break a needle or damage your machine!
Here is what it looks like when you do NOT spin your seams and you just press it all to one side. There are now six layers on one side and only one layer on the other.
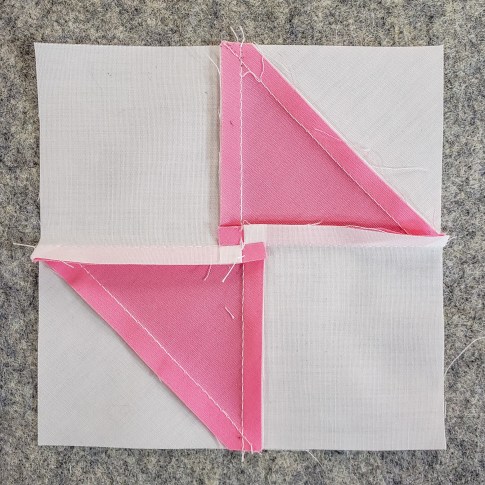
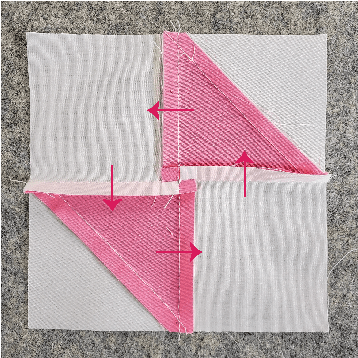
And this is what it looks like when you spin your seams. Your layers are evenly distributed.
When do you spin seams?
This method only works if you are pressing your seams to one side, also known as nesting your seams (and not pressing them open). This can work on any block where there are 3+ seams joining in one place. It is most commonly seen in four-patches.
How to spin seams:
Step 1:
Once you have your four-patch sewn together, head over to your ironing board, and lay your block with your seams facing up. I find it easier to spin if the last seam I just sewed is horizontal to me. We will just be pressing our seams with our fingers, and coming in with an iron after.
In this example, my top row has a seam pressed to the left, and my bottom row has a seam pressed to the right.
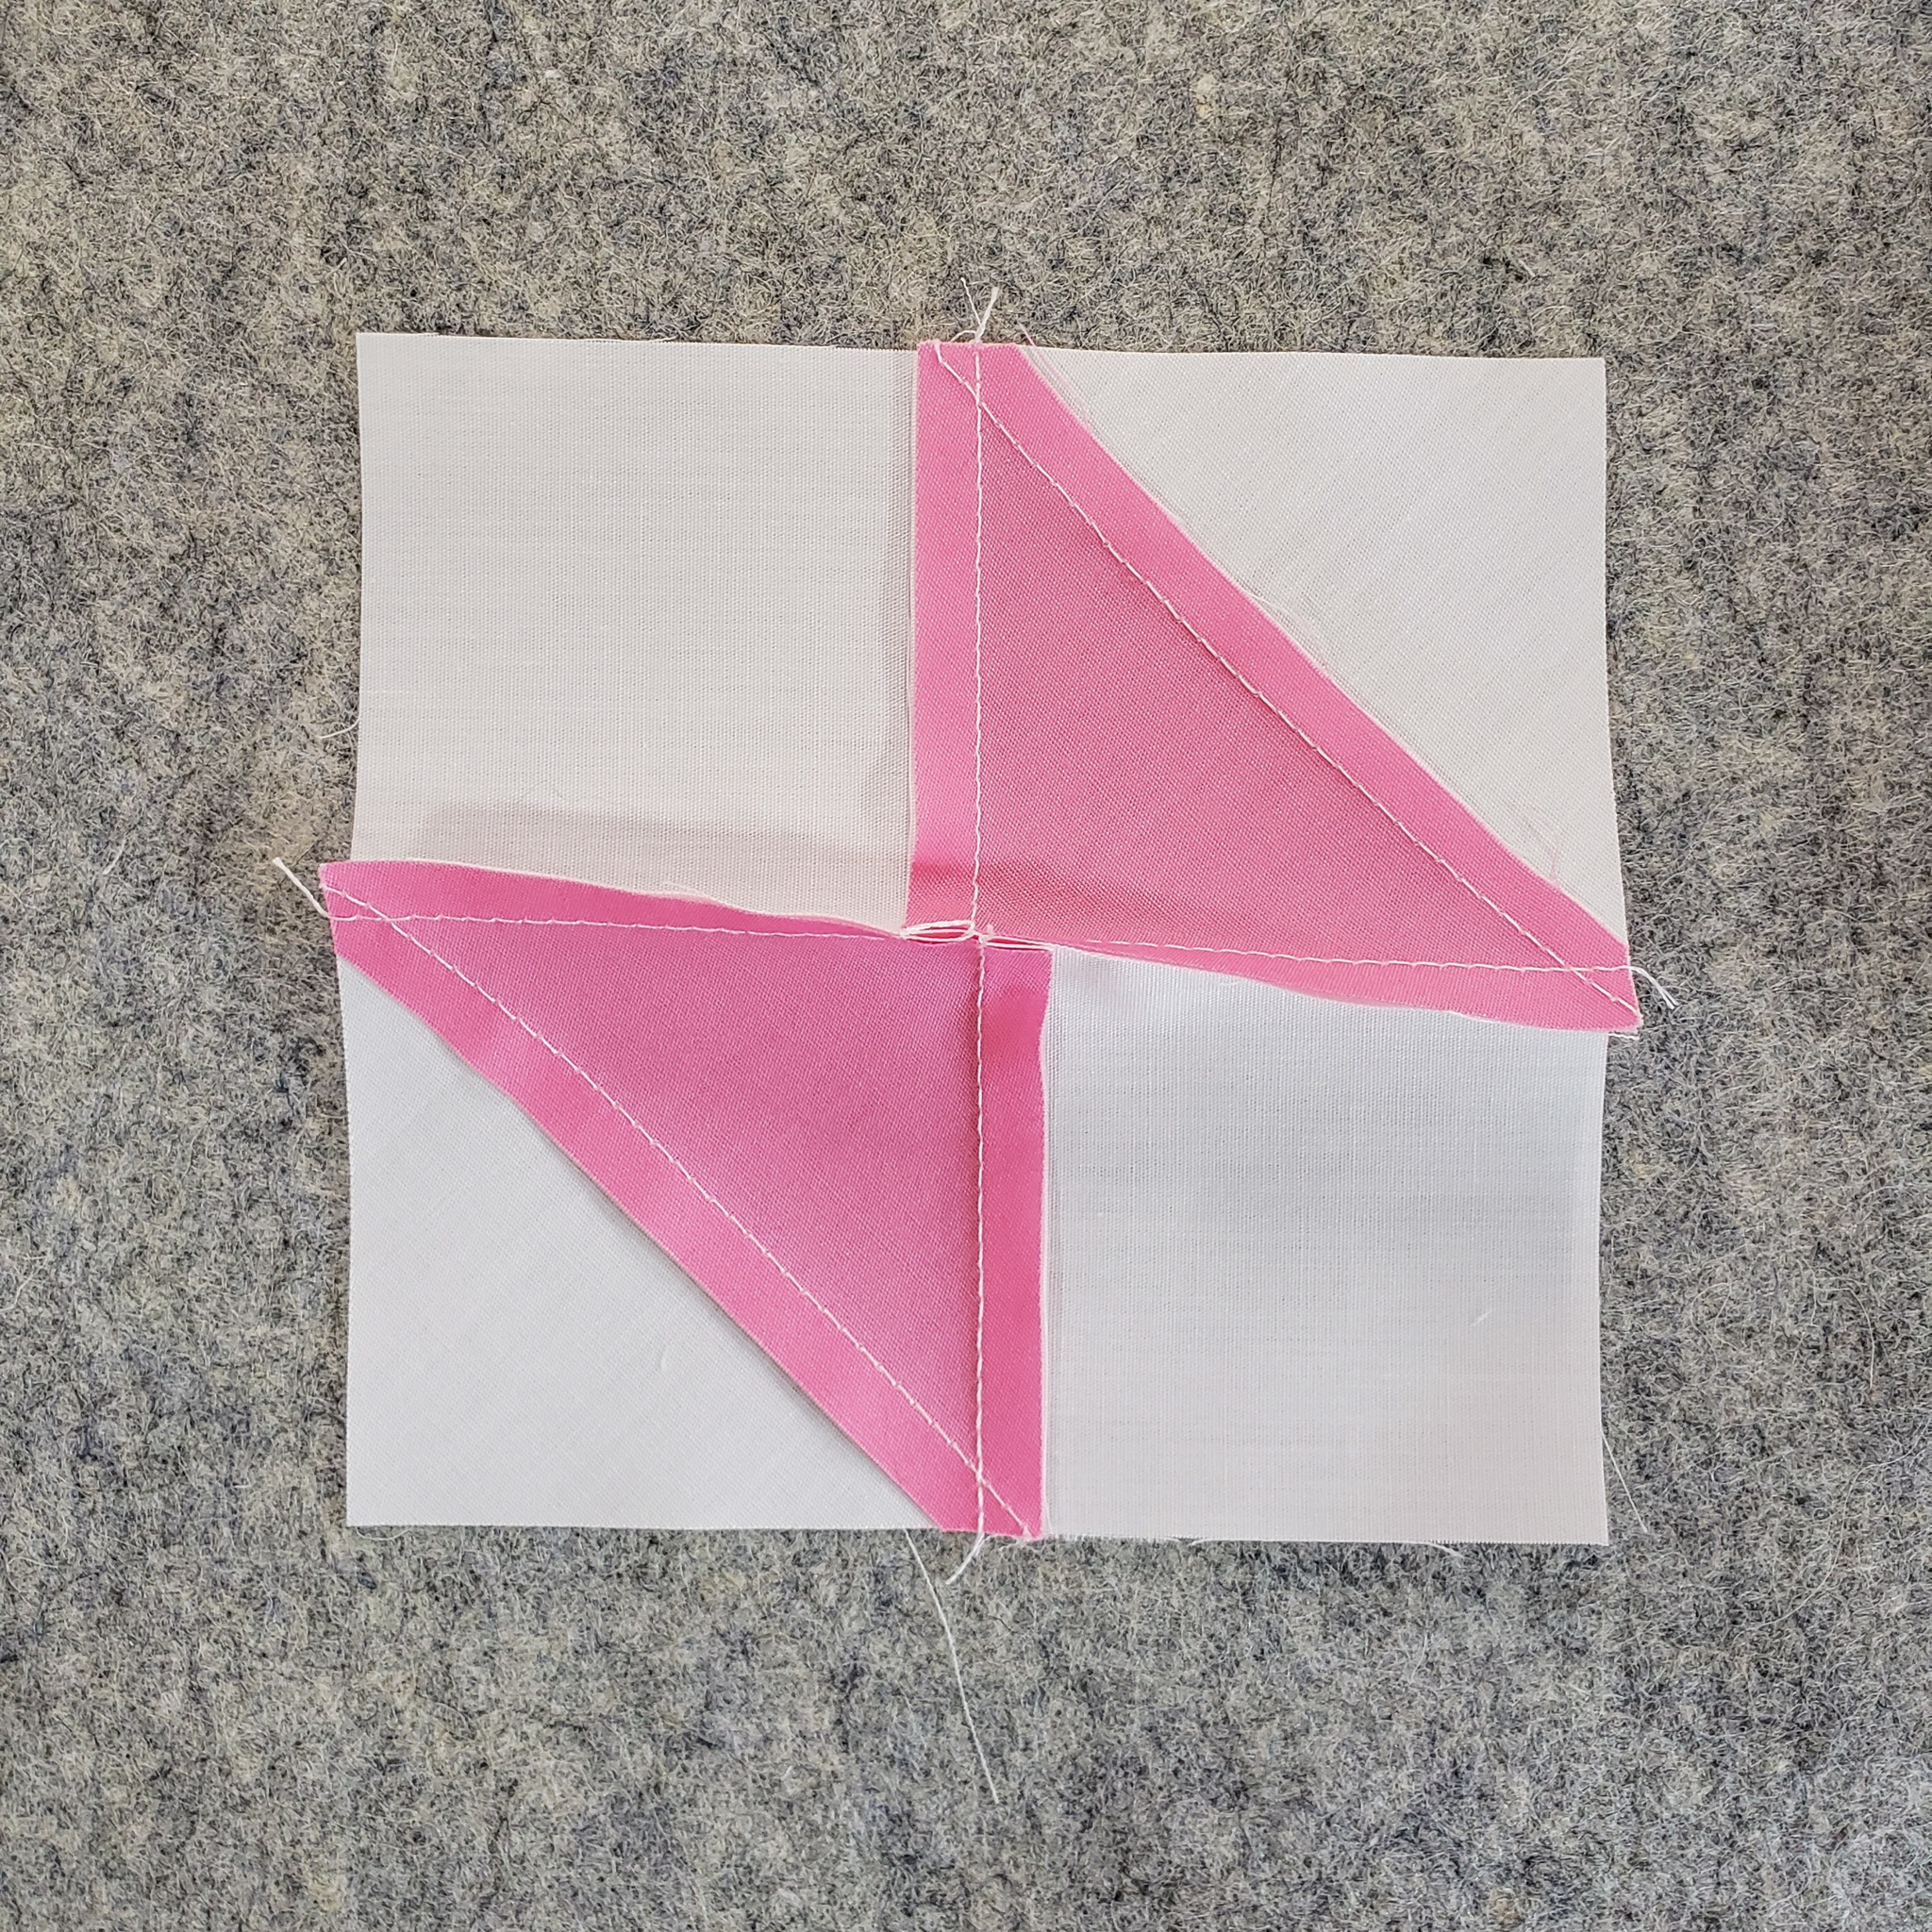
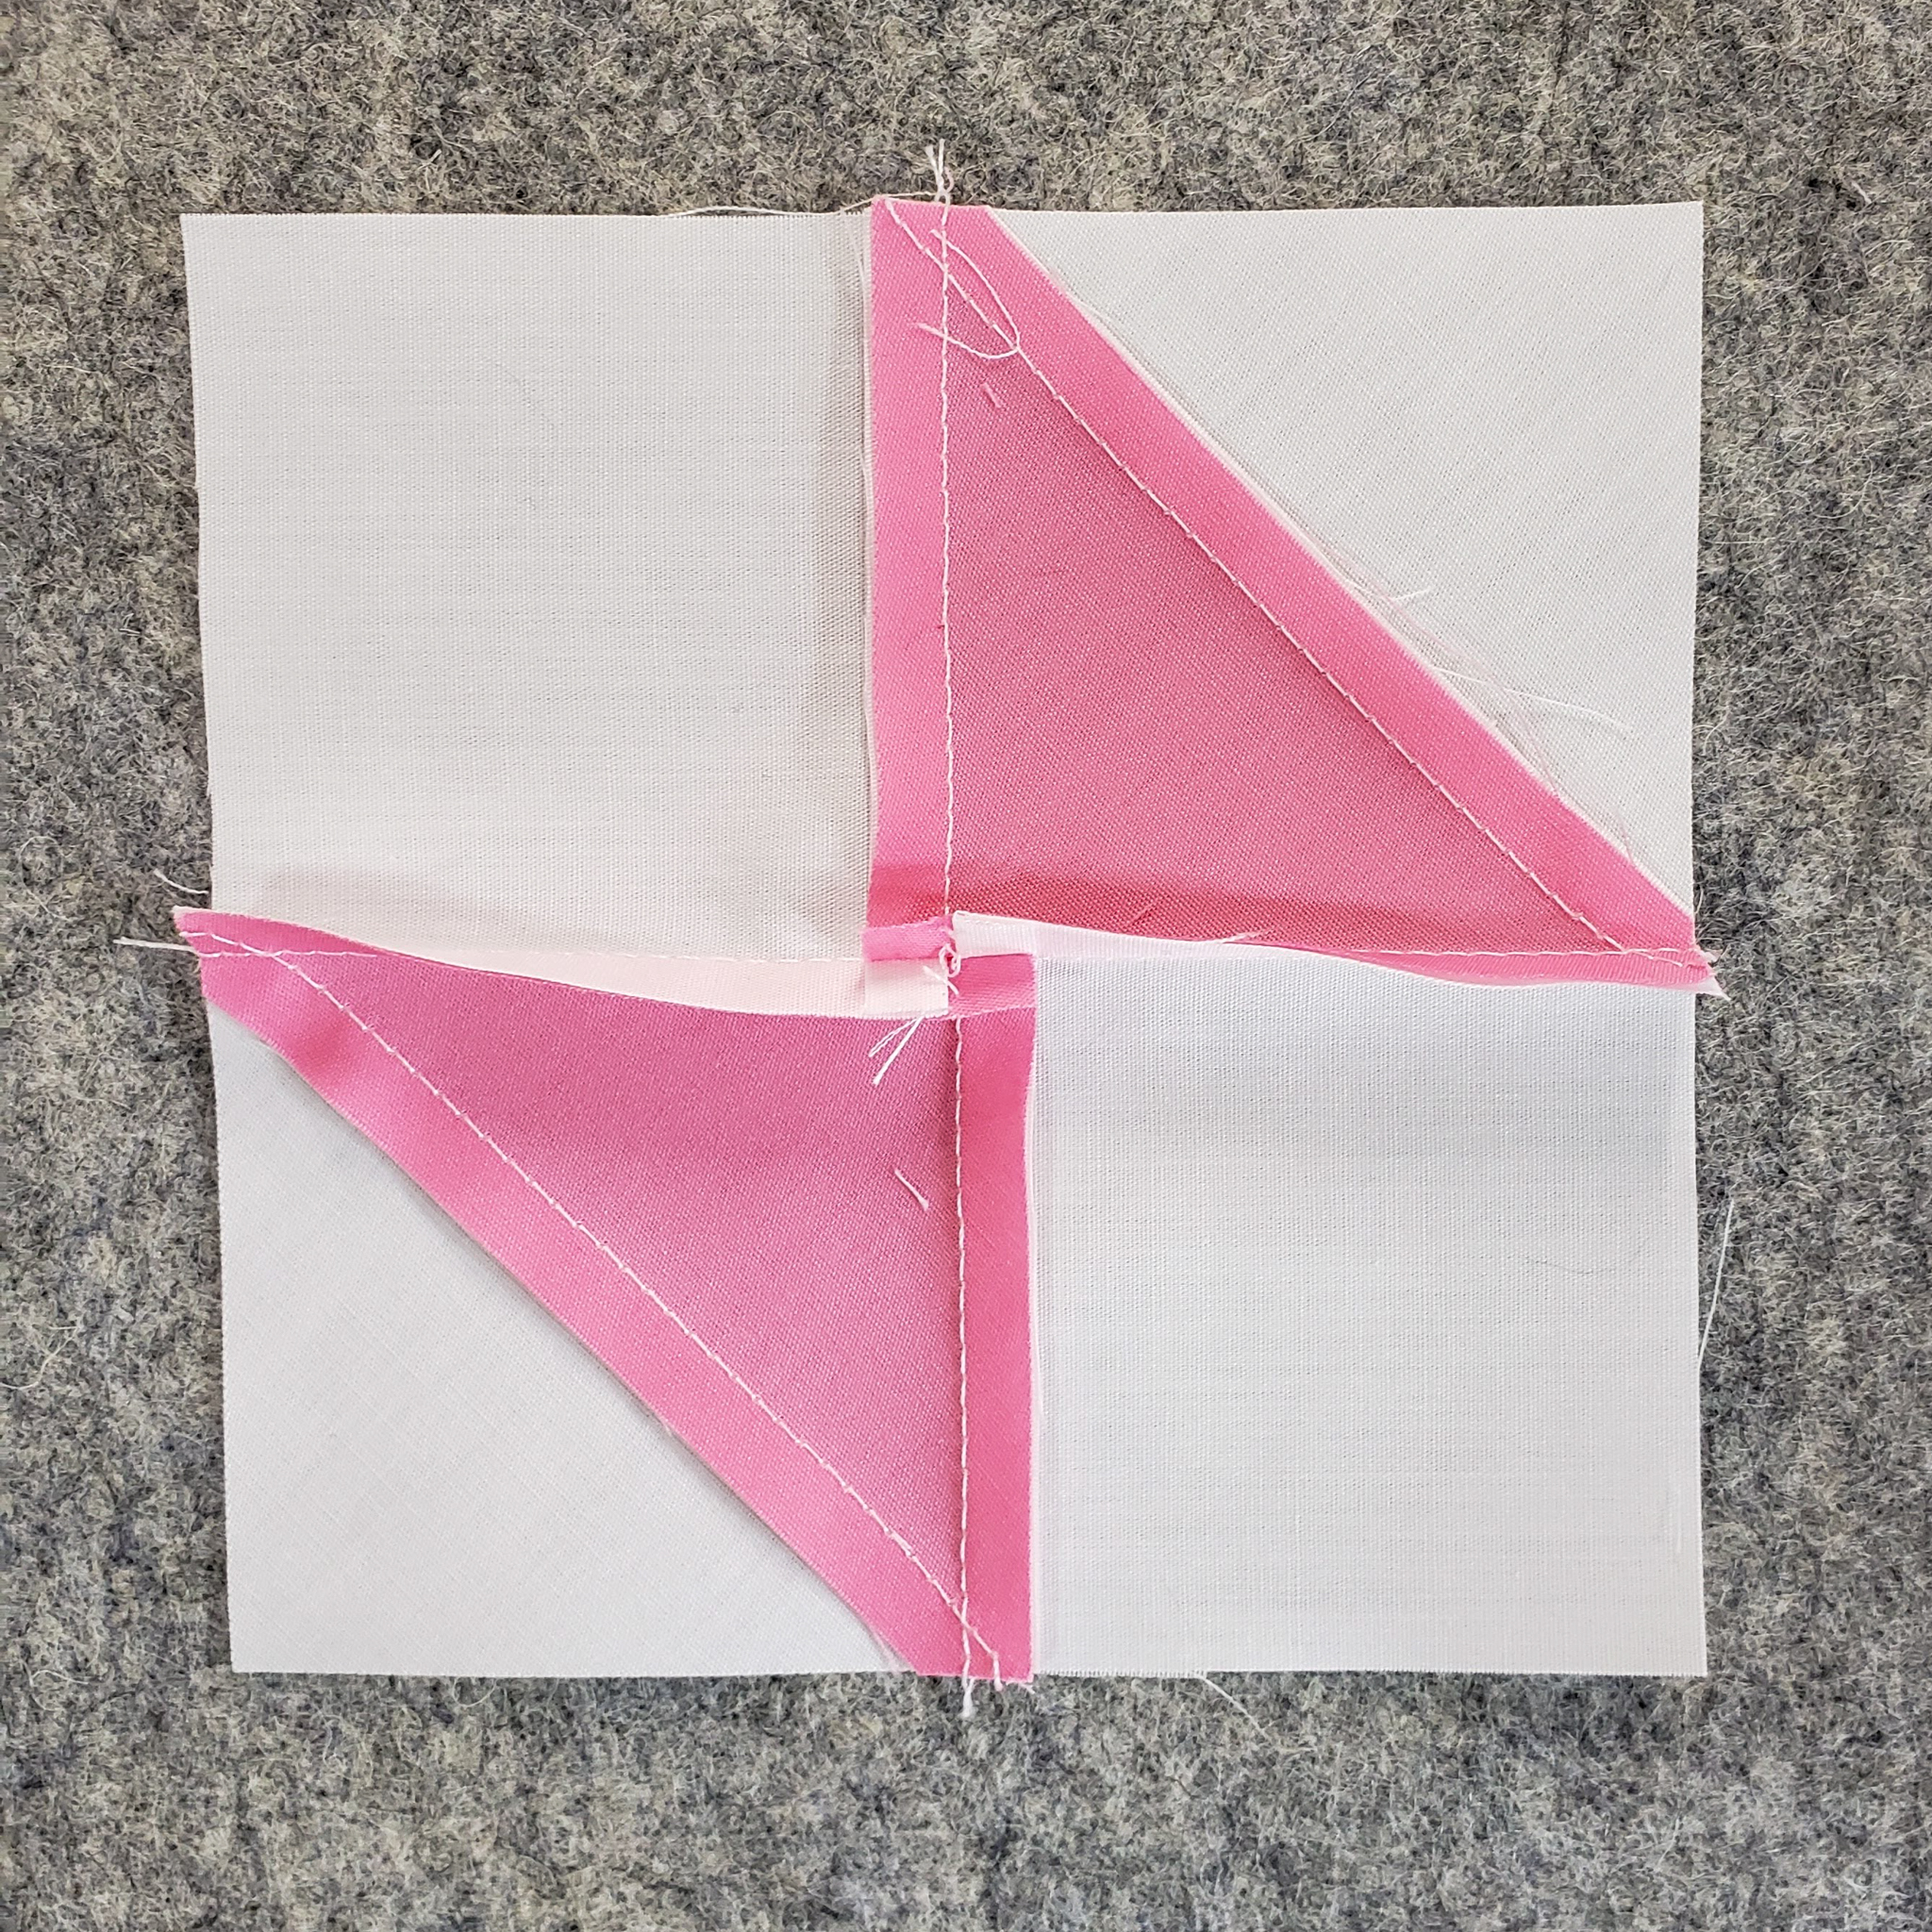
If I think about wanting to distribute the layers, it makes sense that on each side, I want to press towards the path of least resistance.
Step 2:
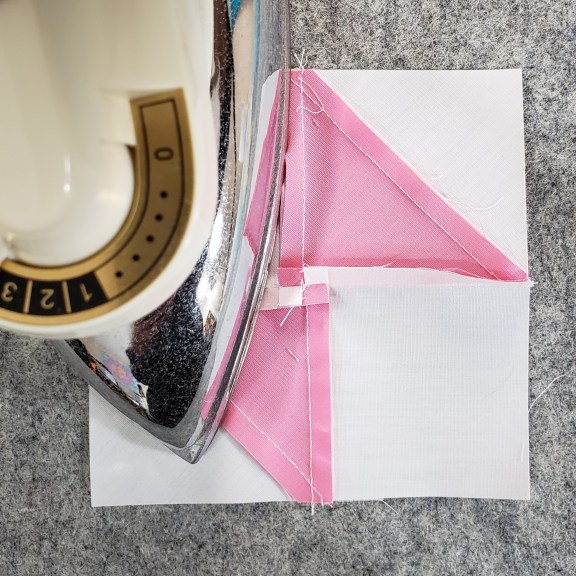
On the left, I want to press my horizontal seam DOWN, which is away from the top row seam that was pressed to the left.
Step 3:
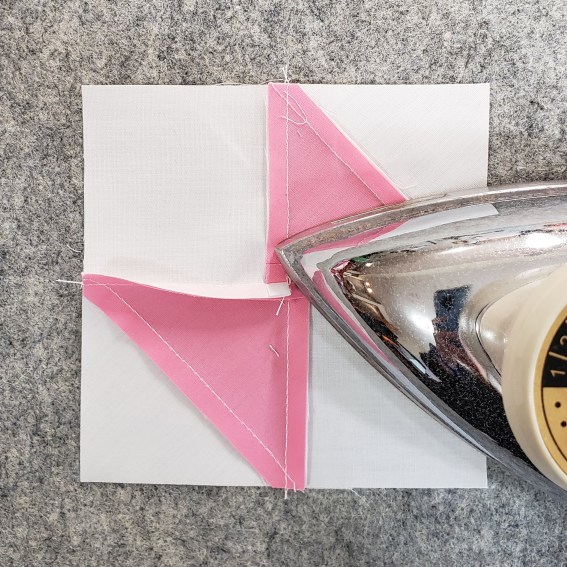
On the right, I want to press my horizontal seam UP, which is away from the bottom row seam that was pressed to the right.
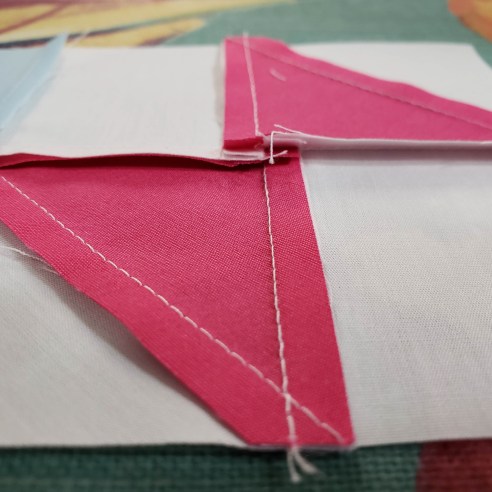
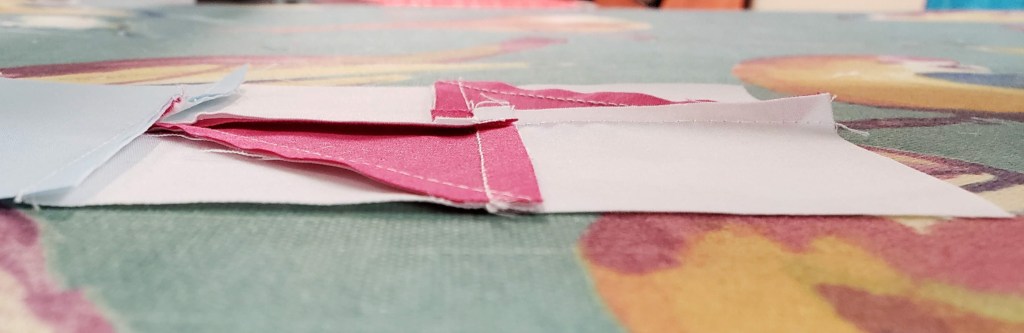
Note: When you this, you will need to pull out a few stitches from the middle of the join, to flatten out your horizontal seam.
Step 4:
With your iron, gently PRESS on the middle join you just created, and then gently PRESS your two other seams on the left and right. It is very important to not move your iron over these seams or you will warp your quilt block!
Now you can see how your seams are now spinning around this block!
I hope you found this Basics Tutorial helpful! Make sure to check out the rest of the tutorials for more!
Happy Sewing!
Simone


0 Comments